Google Play Console API Setup Guide
Complete guide to create a Google Cloud service account, enable the Google Play Android Developer API, and link it to Google Play Console so LaunchMaster Studio can read and update your Android app metadata, store listings, and localizations.
Prerequisites
- Active Google Play Developer Account with Owner or Admin role
- Access to Google Cloud Platform Console
- Your Android app already created (published or in testing) on Google Play
- LaunchMaster Studio installed on your Mac or Windows PC
Note that it can take up to 36 hours for newly created Play Service Account Credentials to propagate and start working properly with the Google Play Developer API — if LaunchMaster Studio fails to connect right after completing these steps, please wait and try again later.
Part 1 — Google Cloud Platform Setup
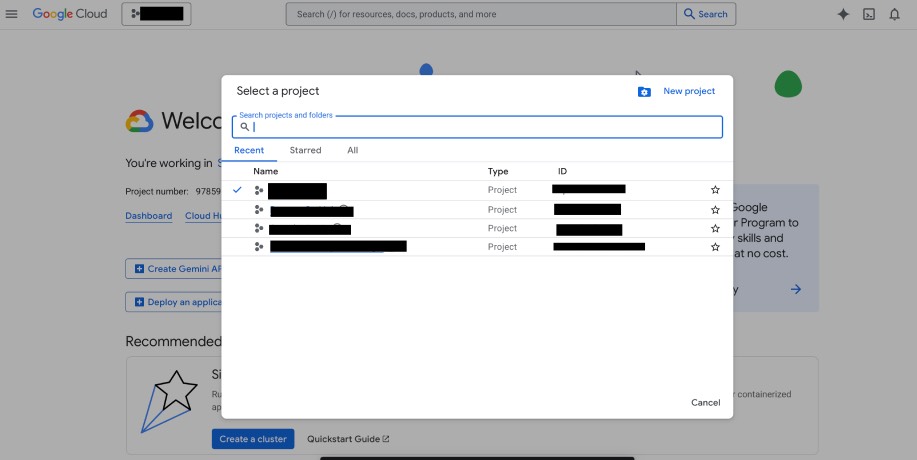
Create or select a Google Cloud project
Go to console.cloud.google.com. In the top navigation bar, click the project
selector dropdown and either choose an existing project or click New Project to create
a dedicated one (e.g., launchmaster-play). Using a dedicated project makes it easier to
audit API usage later.
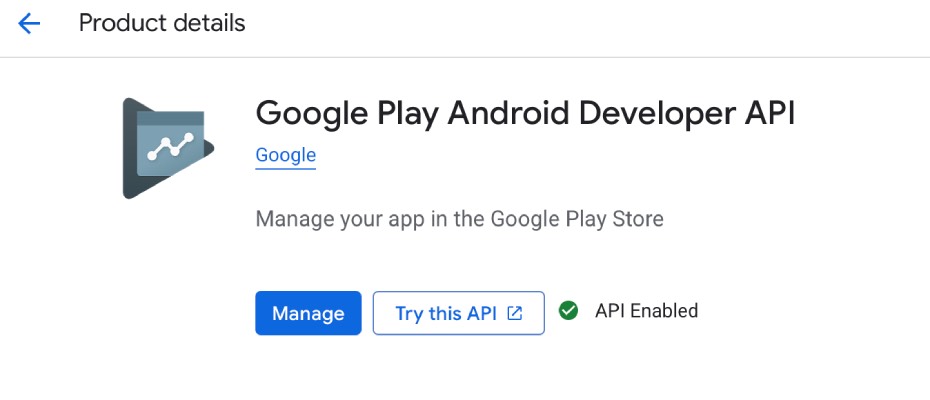
Enable the Google Play Android Developer API
In the left sidebar navigate to APIs & Services → Library. Search for Google Play Android Developer API and click it, then click Enable. This API allows LaunchMaster Studio to read and update your app's store listings, localizations, and release tracks.
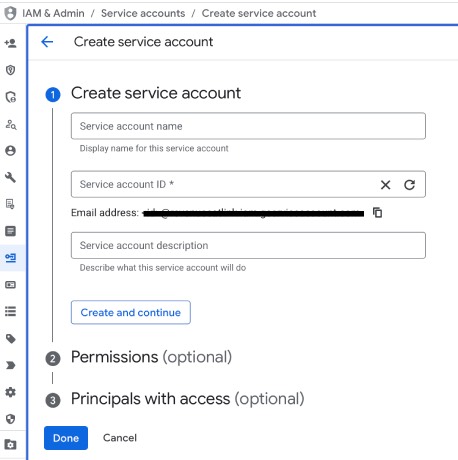
Create a Google Cloud service account
Navigate to IAM & Admin → Service Accounts and click Create Service Account. Fill in the form:
- Service account name: e.g.,
launchmaster-play - Service account ID: auto-filled based on the name
- Description: e.g.,
Used by LaunchMaster Studio for Google Play API access
Click Create and Continue.
Generate and download a JSON key
Click the service account you just created to open its details page. Go to the Keys tab, click Add Key → Create New Key, select JSON, and click Create.
A JSON credentials file will be automatically downloaded to your computer. You will upload this file to LaunchMaster Studio in Step 8.
Part 2 — Google Play Console Configuration
Sign in to Google Play Console
Go to play.google.com/console and sign in with your developer account. Make sure you are signed in as the account owner, not a team member — only owners can manage user permissions.
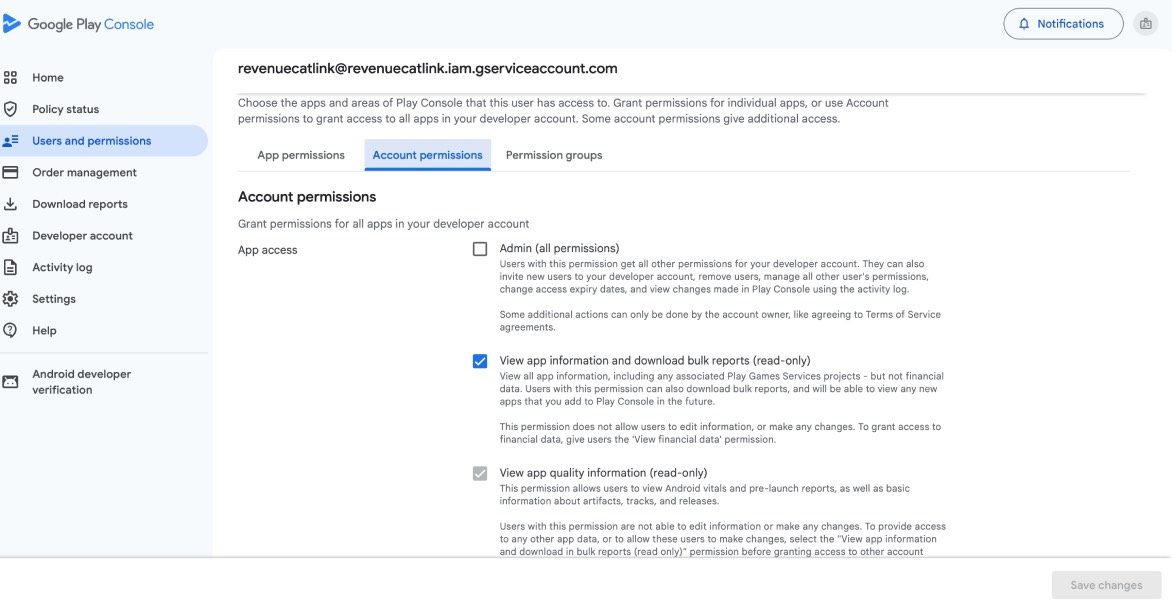
Invite the service account as a user
In the left sidebar go to Users and permissions and click Invite new users. In the Email address field, paste the service account email address.
The email follows this format:
"client_email" field.
Grant the required Google Play permissions
After entering the email, the permission panel appears. Enable the following Account permissions for LaunchMaster Studio to manage your store listings:
| Permission | Status |
|---|---|
| View app information and download bulk reports | Required |
| Create, edit, and delete draft apps | Required |
| Manage store presence | Required |
Under App permissions choose All applications or select specific apps. Click Invite user to save.
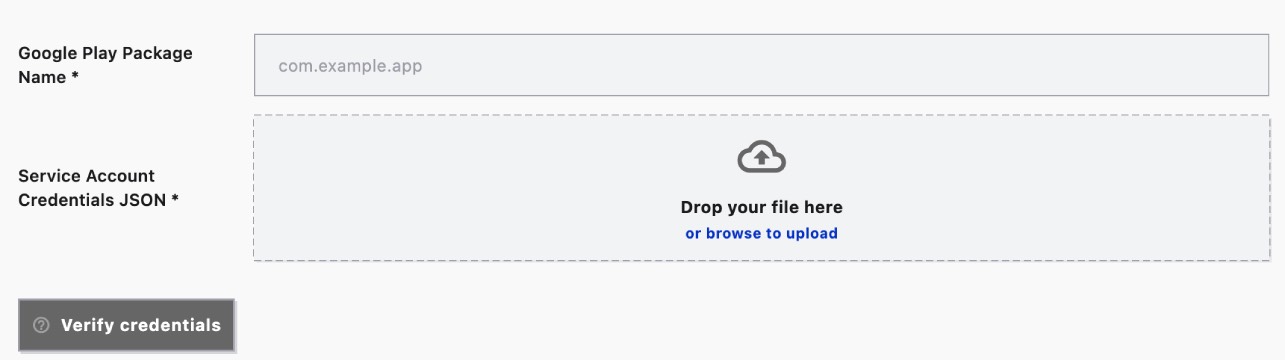
Upload JSON credentials to LaunchMaster Studio
Open LaunchMaster Studio and navigate to your Android project settings. Click Configure Google Play Console and:
- Click Upload JSON File and select the service account key file from Step 4
- Enter your app's Package Name (e.g.,
com.example.myapp)
Click Verify credentials. LaunchMaster Studio will validate the Google Play API connection and confirm that all required permissions are active.
Security Best Practices for Google Play API Credentials
- Never share or commit the service account JSON key file to version control (Git, GitHub, etc.).
- Follow the principle of least privilege — grant only the three permissions listed above and avoid the Owner role for service accounts.
- Periodically audit active service accounts in Google Cloud Console → IAM & Admin → Service Accounts.
- Enable Cloud Audit Logs in Google Cloud Console to track all Google Play API usage.
- Rotate service account keys every 90 days by deleting old keys and generating new ones in the Keys tab.
- If a key is ever compromised, delete it immediately from IAM & Admin and generate a replacement.
Frequently Asked Questions
Why does LaunchMaster Studio need a service account instead of my Google account?
Google Play's API requires OAuth2 machine credentials for automated access. A service account provides a non-interactive credential that works even when you are not logged in, and can be granted only the specific permissions LaunchMaster Studio needs.
I get a "403 Forbidden" error after setup — what should I do?
Google Play permission changes can take up to 24 hours to propagate. Wait and try again. Also confirm that the Google Play Android Developer API is enabled in your Google Cloud project, and that the correct service account email was invited in Google Play Console.
Can I use the same service account for multiple Android apps?
Yes. In Step 7, choose All applications under App permissions, or add individual apps later from the service account's permissions page in Google Play Console.